
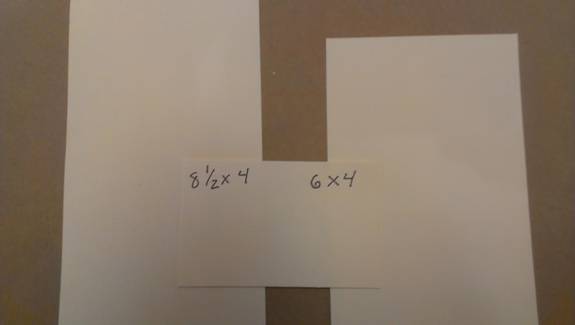
Now it’s time to get have some fun and create a do-it-yourself wedding favor! This particular favor is easy-peezy, lemon-squeezy and you can include some candied almonds, small chocolates or a small meaningful trinket as a gift to the guests. The following directions and photos are tailored to utilize an 8.5 inches by 4 inches piece of cardstock, to produce a medium-sized favor. The dimensions are easy to play with so you can make several different sizes. The photos also include the dimensions for a small box with the dimensions of 6 inches by 4 inches and a favor with a flap-closure. Choose the favor that would match-up with your needs, be it time or style preference.
(Photo 1)
Time to begin!
STEP 1 – (Photo 1) First, it is important to choose paper that will be thick enough to hold your sweet treats but will also be flexible enough to score and fold. Cardstock is a good type of paper for almost any crafts and come in an array of styles and colors. Consider choosing paper that will go with the theme of your wedding and compliment your color choices.Always make an example so that you can try out the steps on a sample paper and not use any of your actual paper.
STEP 2 – (Photo 2) Grab your handy scoring board and scorer, and position your sample 8 ½ by 4inch cardstock horizontally. Score at these intervals:
3.75 inches
4.75 inches
If you are using the 6 by 4 inches, position the paper horizontally and score at these intervals:
2.5 inches
3.5 inches
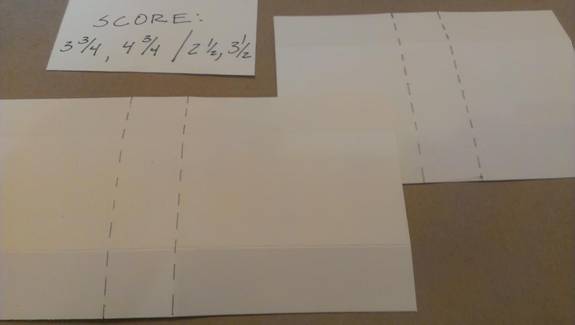
(Photo 2)
{Photo 2 – The paper on the left is the 8 ½ by 4 inches paper (L) while the right is the 6 by 4 inches paper (R).
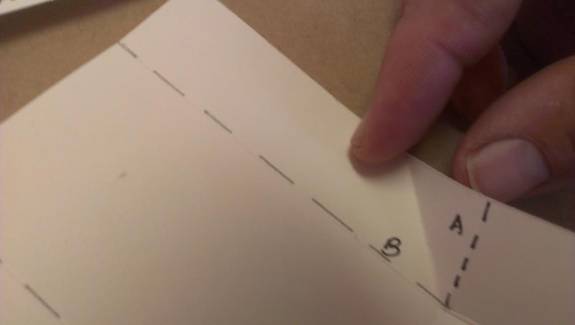
STEP 3 – (Photo 3)Flip the 8 ½ by 4inch paper over and position it vertically. Score at these intervals:
1 inch
3 inch
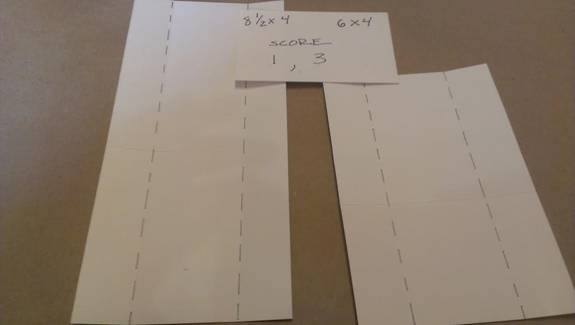
(Photo 3)
{Photo 3 – Position R vertically and score at 1 and 3 inch marks}
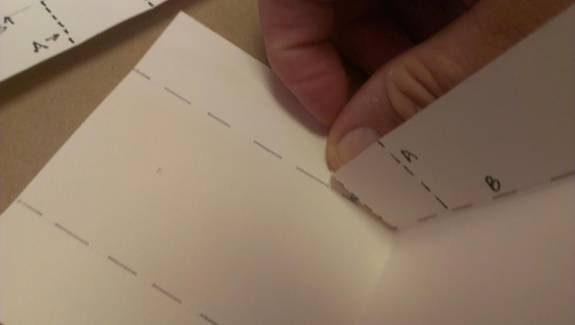
STEP 4 – (Photo 4) Place the paper horizontally and fold the top scored edge down. Do the same with the scored bottom edge but fold up.

(Photo 5)
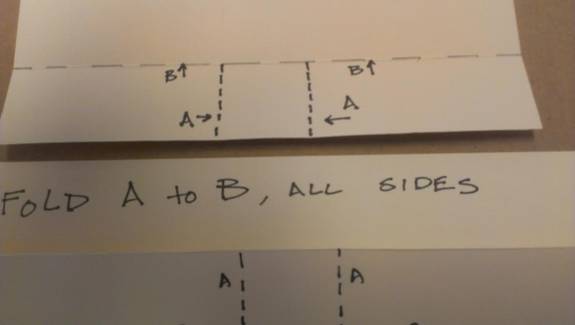
{Photo 5 – In the photo above, B is labeling the 2 scored sections within the paper. A is the section scored in the STEP 2}
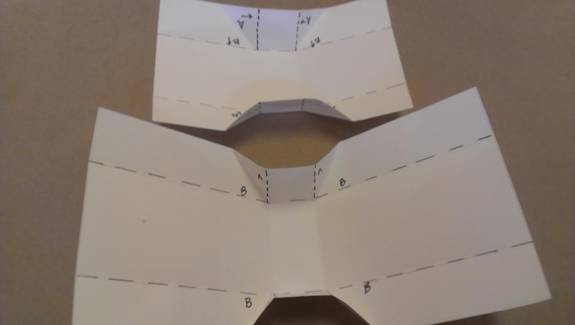
(Photo 6)
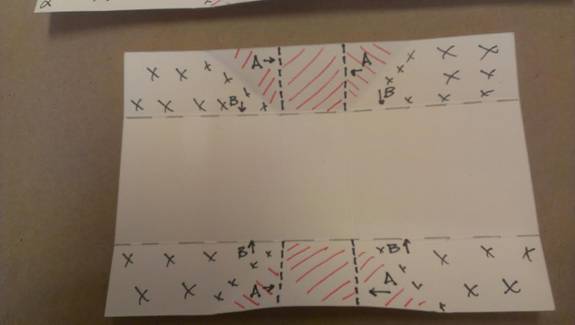
STEP 5 – (Photo 6) Fold section A to section B. Do this to all sides.
{Photo 6 – Follow the directions of the arrow.}
(Photo 7)
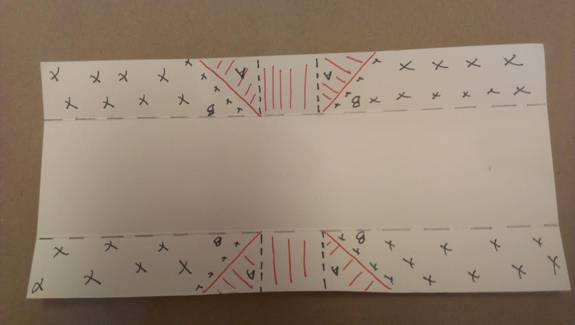
STEP 6 – (Photo 7) Fold corner A towards corner B, creating a diagonal line.
{Photo 7 – Fold corner A towards corner B, creating a diagonal line.}
(Photo 8)
STEP 7 – (Photo 8) As you fold the corner A to corner B it will make a boxed corner
STEP 8 – (Photo 9) Do STEP 7 to the other side.
(Photo 9)
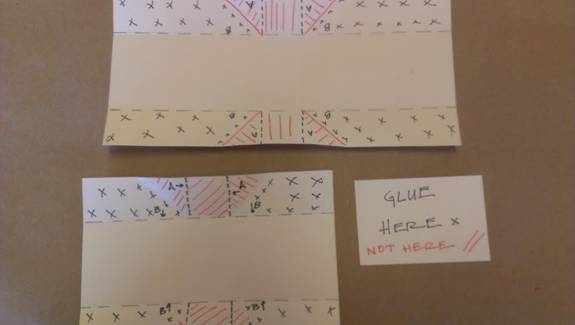
STEP 9 – (Photo 10 and 11) Photo 10 illustrates that ‘X’ is where a glue-stick can be applied. The red diagonallines show where you do not have to apply the glue.
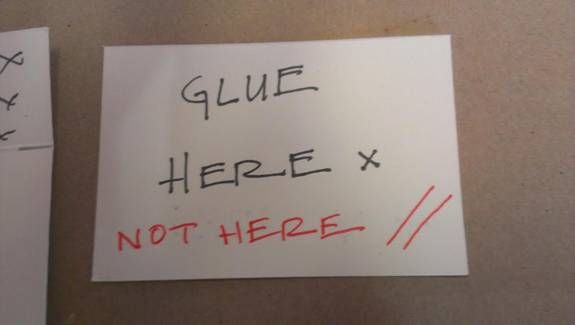
(Photo 10)
(Photo 11)
{Photo 11 – Black ‘X’ for glue, Red diagonal lines for no glue.}
(Photo 12)
{Photo 12- Marked areas for size 6 by 4 inch paper.}
(Photo 13)
{Photo 13 – Marked areas for size 8 ½ by 4 inch paper.}
STEP 13 – (Photo 14) Turn the paper over and fold in towards the center of the paper.
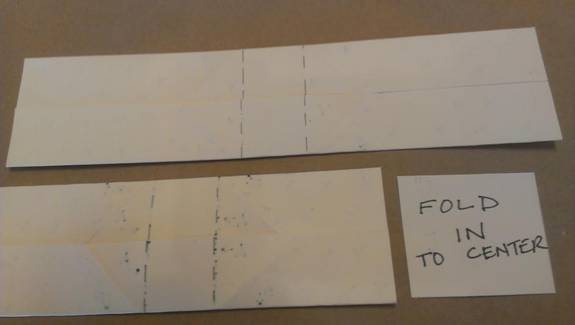
(Photo 14)
STEP 14 – (Photo 15) Lift up the sides of the favor to close. The center of the favor should form the bottom of the box.
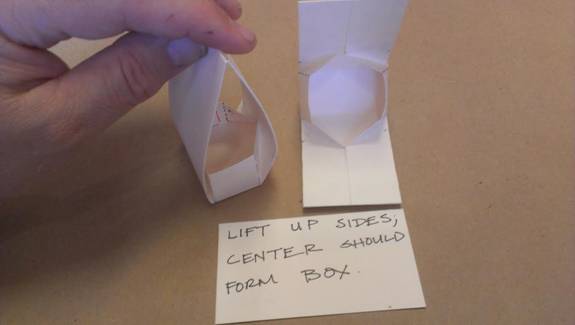
(Photo 15)
STEP 15 – (Photo 16) Close the favor up and clip with a small wooden clothespin for a 10 minutes. This will ensure that the favor will stay closed.
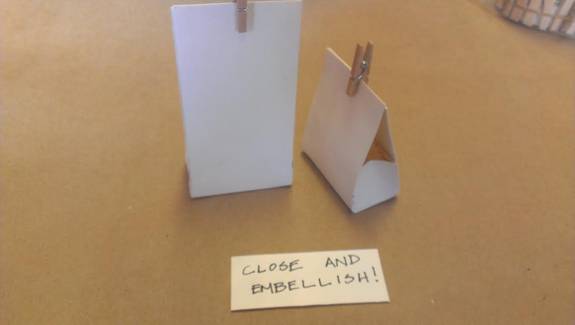
(Photo 16 – Close and embellish!)
STEP 16 – (Photo 17) Have fun decorating the favors using a variety of beads, charms, brads and/or ribbon! If you plan to use an adhesive for decorating the favors, choose one that will not have the object coming off at a later time. Some good choices include red tape and glue dots. Use E-6000 for heavier objects.
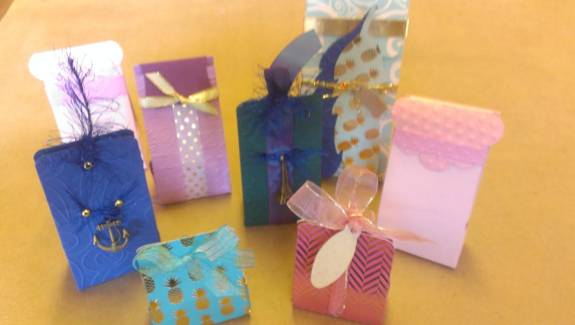
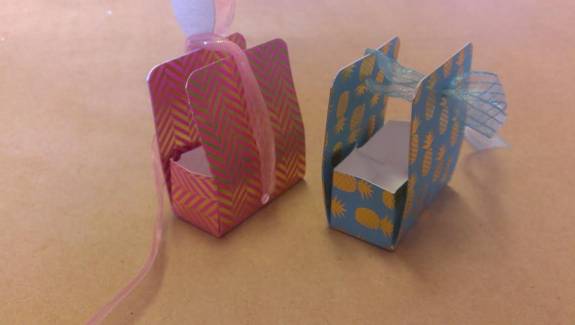
(Photo 17 – Embellished favors. A nice variety of ideas to choose from!)
Finished favors with the paper size 6 inches by 4 inches are pictured in Photos 18 and 19. These are closed by punching a hole in the center of the top flaps and beautified by threading a colorful ribbon to help close them up!
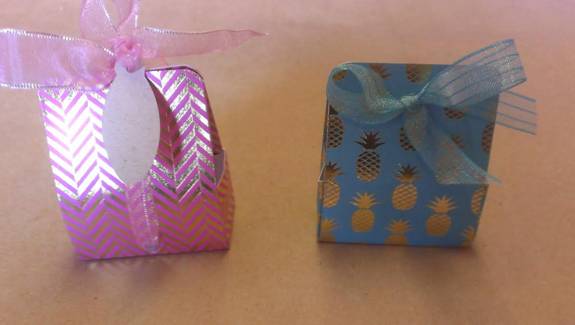
(Photo 18 – To close these smaller guys up, you could use a solid color or sheer ribbon, raffia or twine.)
{Photo 19 – This is a side view of the depth of the favor box. Just enough room for some tasty goodies!}
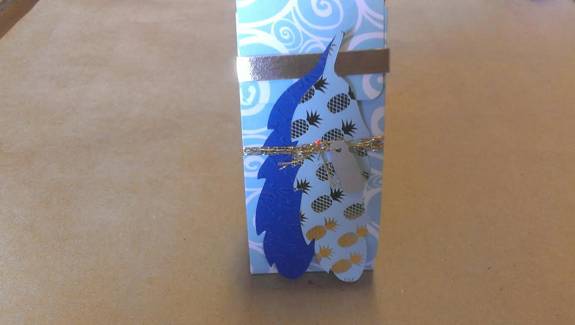
{Photo 20 – This is the favor with a flap-closure. VERY simple and fun!}
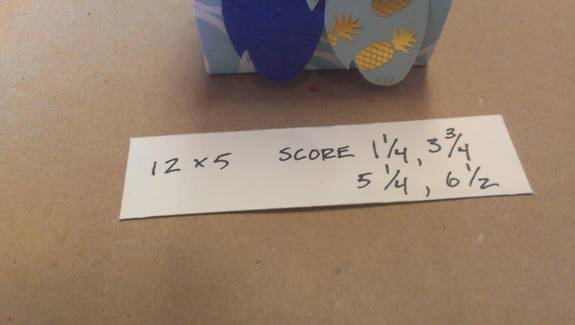
To make the favor at a larger size with the above flap-closure, change the size of the paper to 12 inches by 5 inches.
{Photo 21 – Flap-closure scoring marks.}
Score the paper horizontally at these intervals (Like STEP 2):
1.25 inches
3.75 inches
Flip the paper vertically and score at the intervals (Like STEP 3):
5.25 inches
6.5 inches
Then follow the other steps as shown above. Embellish and give to guests with a happy smile!!

Leave A Comment